Cleaning drum heads might not be as fun as laying down grooves, but it’s a game-changer for sound and feel. Whether you’re wiping off stick marks or removing grime from months of sweaty sessions, how you clean matters.
I’ve seen drumheads ruined by harsh cleaners and saved with the right cloth and five minutes of love. If your heads look nasty or feel off, it’s probably time for a wipe – not a replacement.
To clean drum heads safely, use a microfiber cloth and a mild soap and water mix. Avoid harsh chemicals – especially on coated heads to preserve tone and surface texture.
In this guide, I’ll show you 3 simple, safe, and tested ways to clean your drum heads without killing their tone (or the coating).
Cleaning Drum Heads Does Matter
Over time, sweat, dust, and stick marks build up and leave nasty marks on your drumheads. But did you know it does affect the tone and feel too?
That’s why cleaning drum heads is important to make sure your kit not only looks good, but also has a killer tone.
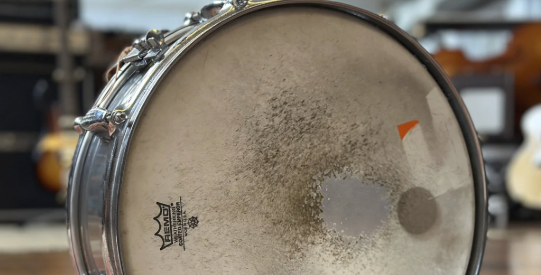
All the dirt really loves to stick on to coated heads like the Remo Ambassador or Evans UV1. That grime dulls the rebound and chokes out the resonance you worked so hard to tune in.
If you’ve noticed your toms sounding flat or your snare feeling dead, you might not need new heads – just a cloth and five minutes. For players chasing a specific tone or practicing dynamic control, a clean surface makes a difference you can feel.
Not sure how your drumhead material affects sound and longevity? We break that down fully in our Drumhead Thickness Guide and How to Choose the Right Drumheads.
A clean head gives you a better playing surface, a more honest tone, and ultimately, longer lifespan before replacement.
Choosing the Right Way to Clean Different Drumhead Types
Before you start wiping things down, it helps to know what you’re working with. Not all drumheads are built the same, and cleaning the wrong way can actually damage the surface, and especially if you’re using coated or specialty heads.
Most drumheads today are made from Mylar, a type of polyester film. But how it’s layered, finished, and treated changes everything:
- Coated drumheads (like the Remo Ambassador Coated or Evans UV1) have a textured surface sprayed or baked on. This coating gives warmth and control – but it’s very delicate. Scrub too hard or use the wrong cleaner, and you’ll wear it off fast.
- Clear heads (like Evans G2 Clear or Remo Emperor Clear) are smoother and less prone to visible grime, but oils and dust still settle in. The good news? They’re easier to clean without damaging the surface.
- Textured or specialty heads (like Aquarian Texture Coated or Remo Fiberskyn) often require extra care. These aren’t heads you want to hit with anything harsher than a damp microfiber cloth.
So if you’re unsure, a general rule is this: the more texture your head has, the gentler you should be.
If you’re still not sure which head type you’ve got or how it affects tone, you’ll find a full breakdown in our Best Drumheads by Genre guide – it covers both sound and material comparisons.
Coated vs Clear Drumhead Cleaning
Now that you know what kind of drumhead you’re working with – coated, clear, or textured – the next step is actually cleaning them the right way.
Think of this section like a quick reference guide for how to clean each type without messing up your tone:
Coated Drum Heads: Keep It Gentle
Coated drumheads are the most fragile. Use a dry microfiber cloth first – that’ll often do the trick. If you need more, slightly dampen the cloth with distilled water only.
Avoid soap, and never scrub in circles. Even light abrasion can thin out the coating over time, dulling your stick feel and tone.
Stick marks? Live with some of them – a bit of wear adds character and doesn’t affect sound.
Clear Drum Heads: Clean and Tougher
Clear drumheads can handle more. A light mix of water and mild dish soap on a soft cloth works well. Wipe in smooth, straight lines, not hard circles.
Always dry thoroughly – leftover moisture can affect stick grip and even attract more dust.
If your stick marks are stubborn, use a small dab of isopropyl alcohol – obviously, just keep it away from logos or edges.
Specialty & Textured Drum Heads: Minimal Effort
Textured heads like Remo Fiberskyn, Aquarian Texture Coated, or calfskin-style heads are tone-first designs.
Clean them only when you really need to, and even then, use just a slightly damp cloth – no soap, no chemicals, no scrubbing.
Any wear is purely cosmetic and usually not worth risking tone.
Step by Step Guide to Clean Your Drumheads Safely
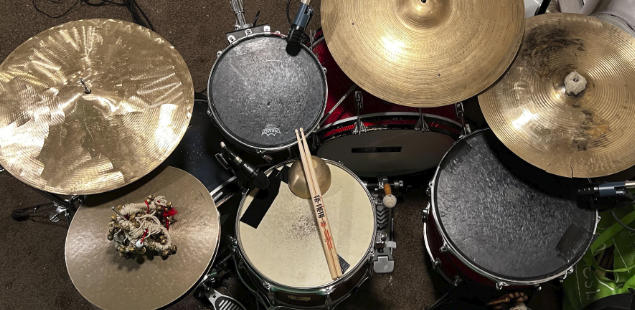
Whether you’re cleaning a single head or your whole kit, this method works for all types – as long as you adjust your touch based on the head’s surface.
Here’s the foolproof process I use in my studio and before every major gig:
1. Remove Dust and Loose Debris First
Start with a dry microfiber cloth or soft brush. Lightly wipe the surface to remove dust, skin flakes, and stick residue. This step matters more than you think – rubbing dirt into the head with water can scratch or dull the surface.
Don’t use paper towels. They’re too rough and can break down, leaving lint behind.
2. Dampen, Don’t Soak
For coated heads, use distilled water only on a clean microfiber cloth. For clear heads, you can add a drop of dish soap to warm water. Wring it out thoroughly – the cloth should feel just barely damp.
Wipe in smooth, straight lines across the drumhead. Avoid circular scrubbing motions, especially on coated heads.
3. Handle Logos and Edges with Care
Drumhead logos are usually screen-printed and can fade fast. Wipe around them if possible. Same goes for edges – don’t let water pool near the hoop, especially if your bearing edge isn’t sealed.
Did you know? Water near the edge can sneak under the collar and affect the head’s seat. That messes with tuning and resonance.
4. Dry and Buff
Use a second dry microfiber cloth to gently buff the surface. This brings back some of the texture and helps remove leftover moisture. Let the heads air out for at least 15 minutes before putting them back on the kit.
Should You Clean or Just Replace Dirty Drumheads?
This question comes up all the time. And honestly? It depends on how bad the grime is and how your drumhead sounds.
A few stick marks and scuffs? Totally normal. In fact, some drummers love a bit of wear because it makes the kit look “played in.”
But if your head is discolored, dented, flaking, or has a weird rubbery feel after cleaning – that’s usually a sign it’s time to replace, not rescue.
Signs It’s Time to Replace:
- Deep dents or pitting in the playing zone
- Loss of tone, especially on coated snares or toms
- Coating flaking off, exposing smooth film underneath
- Buzzing or tuning issues that don’t resolve with seating or tuning
Even after a deep clean, if the head still sounds dead, it probably is. At that point, you’re better off swapping in a fresh one.
Pro Tip: If you’re unsure whether it’s wear or tuning, check out our guide on When to Replace Drum Heads – it walks you through the key signs based on tone, feel, and age.
That said, if your drumheads are just dirty, a proper cleaning like we’ve outlined above can bring back clarity, stick response, and tuning stability – especially on coated heads that get dusty fast.
And don’t forget, cleaning is also about preserving the sound you already have. If you’re using premium heads like Evans UV1, Remo Ambassador, or Aquarian Texture Coated, it’s worth keeping them fresh for as long as possible before they wear out.
Common Drumhead Cleaning Mistakes to Avoid
Cleaning drum heads isn’t complicated, but doing it wrong can ruin your tone, shorten the lifespan of your heads, or even damage delicate coatings. I’ve seen it (and done it) enough times to know what not to do.
1. Using Household Cleaners or Alcohol
It might seem smart to use a bit of Windex or rubbing alcohol to get that shine back – but please don’t. Most household cleaners are too harsh for drumhead film and can dry it out or strip away coatings.
Stick with distilled water, or a tiny drop of mild dish soap if you’re cleaning clear heads.
2. Over-Scrubbing Coated Heads
Coated drumheads are fragile. If you use rough towels or scrub in circles, you’ll wear down the textured surface – and that means less tone control, less grip, and a slick surface that feels weird under the stick.
Use straight motions with soft cloths only. Less is more.
If you want to understand how coatings affect your tone head over to Coated vs Clear Drumheads for the full tonal breakdown.
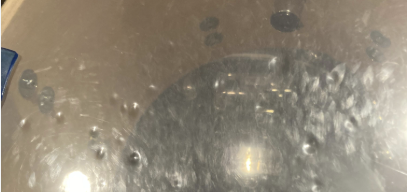
3. Letting Water Sit on the Head
Drumheads don’t like moisture pooling up. Letting even a little water settle around the edges or near the collar can lead to warping or affect the way the head seats on the shell.
Always dry thoroughly with a microfiber cloth, and air dry before reinstallation.
4. Ignoring the Underside
Especially on snares and toms, resonant heads collect just as much dust over time – even though they don’t get stick marks. Flip your drum and give the bottom head a gentle wipe now and then.
Curious about what resonant heads actually do? We go deep into that in our Drumhead Buyer’s Guide.
How Often Should You Clean Your Drumheads?
Let’s be real, most of us don’t clean our drumheads nearly as often as we should. And hey, I’ve been guilty too. But the truth is, keeping your heads clean makes a real difference in both tone and longevity.
So how often should you actually clean them?
Casual or Hobby Drummers
If you’re playing a few times a week at home or in a rehearsal space, a monthly wipe-down is usually enough. Just a quick pass with a dry microfiber cloth will remove dust, oils, and any stick shavings.
Gigging or Studio Drummers
For regular live players, studio work, or practice-heavy routines, cleaning once every 1–2 weeks is smart – especially for snare and tom heads that build up grime quickly. Coated heads should get even gentler attention to keep the surface intact.
After Every Show or Session?
I know some touring pros who wipe down their heads after every single gig. It sounds excessive, but if you’re playing hot stages, sweaty sets, or in dusty environments, it’s a habit that can really extend the life and tone of your heads.
And if you’re using premium heads like Evans UV1 or Aquarian Texture Coated? Those cost a bit more, so it’s worth keeping them clean and sounding their best.
If you’re constantly playing outdoors, on the road, or in humid environments, clean more often – and always make sure your heads are dry before packing them up.
Final Thoughts
Cleaning drum heads isn’t just about keeping them pretty – it’s about preserving tone, extending lifespan, and making your kit feel fresh every time you sit down.
If you play regularly, you’re leaving behind sweat, stick marks, and grime that slowly kill your tone and responsiveness. And if you’re not careful with how you clean – especially with coated drumheads – you could do more harm than good.
Let’s quickly recap the essentials:
- Use a soft, dry or lightly damp microfiber cloth for most cleaning jobs.
- Avoid harsh cleaners – warm water and a drop of mild soap is plenty for clear heads.
- Be extra gentle with coated or textured heads. Scrubbing will destroy the tone and surface.
- Wipe down your heads every few sessions, and more often if you’re gigging or rehearsing a lot.
At the end of the day, clean drumheads not only sound better – they feel better. And if you’re serious about improving your kit’s performance without spending a fortune? This is one habit worth getting into.